Do you have a wall that requires a bit of a makeover? Or have you ever dreamed of owning a beautiful electric fireplace feature with built-in bookshelves flanking on either side of it?
If you answered “yes” to either of these questions then you’ve definitely come to the right place!
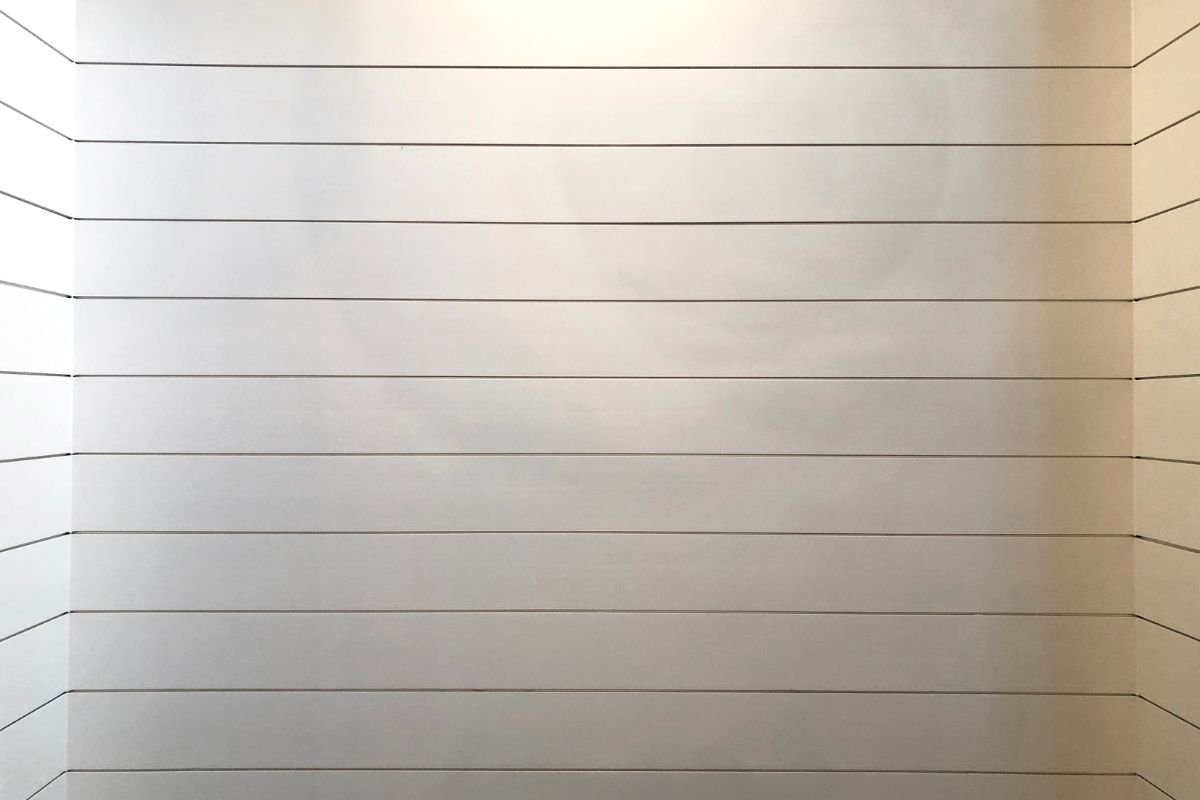
There’s nothing quite like settling down in the comfort of your own home during the colder winter months with the fire on full blast, a book in one hand, and your favorite hot drink in the other.
And with the subsequent rise in demand for more minimalistic yet entirely modern home interiors, there’s never been as great of a time to create a custom fireplace and bookshelves feature wall as now!
If you decide to tackle this modern fireplace feature wall project head-on, your measurements may differ from ours depending on the actual dimensions of your room and the desired size of your hearth.
Yet if you’re aching for your dream mantel in time for the Holidays this year, or are simply fed up with having to stare at a ginormous blank wall whenever you’re relaxing at home, this guide may come in extremely handy!
Whatever the reason, if you’re looking to create a delightful and highly customizable feature fireplace/bookshelf wall all by yourself, look no further! This article features everything you need to achieve this amazing outcome.
Built-Ins And Fireplaces: A Brief History
Built-in structures and furniture came into fashion during the Arts and Crafts movement of the 19th century.
At this time, these units were an easy way of unifying the design of a home by repeating basic wood motifs throughout the building.
An architect would often choose to incorporate different bookcases into a chimney corner and place additional built-in seating around a fireplace.
At this time before central heating existed, the fireplace was the central feature of a room and was also important in keeping all occupants warm.
This means people would often sit as close to the fireplace as possible to ensure that their body was kept far away from the chill of the outside weather.
Yet when the time of central heating came about, and fireplaces were no longer seen as an absolute necessity, they were — and continue to be — a highly coveted and luxurious way of decorating or enhancing a space.
If no inglenook was able to fit, bookshelves were often used to frame the main fireplace. Many Victorian builders repeated this feature, setting a trend that many architects also followed.
The shelves were often fronted using glass panes to ensure that fireplace dirt was kept away from valuable display items and books. Of course, this isn’t an issue with electric fireplaces!
World War I ended the need for the built-in. After this time, housing needed to be built simply and quickly.
Today, a lot of home decorating styles incorporate these traditional features again, including bookshelves surrounding a fireplace, yet in a clean, modernized way.
Why Choose To Build Bookshelves Around An Electric Fireplace?
Despite everything, bookcases, especially bulkier and sturdier built-in units, are quickly coming back into style!
As people begin to spend more time relaxing from the comfort of their home, hobbies including playing games and reading are beginning to rise in popularity once again.
As great as it is to own lots of books and board games (or video games for that matter) there is one requirement: storage. And lots of it. The solution? This incredibly effective design.
Building a set of shelves around a fireplace creates a timeless and highly practical look.
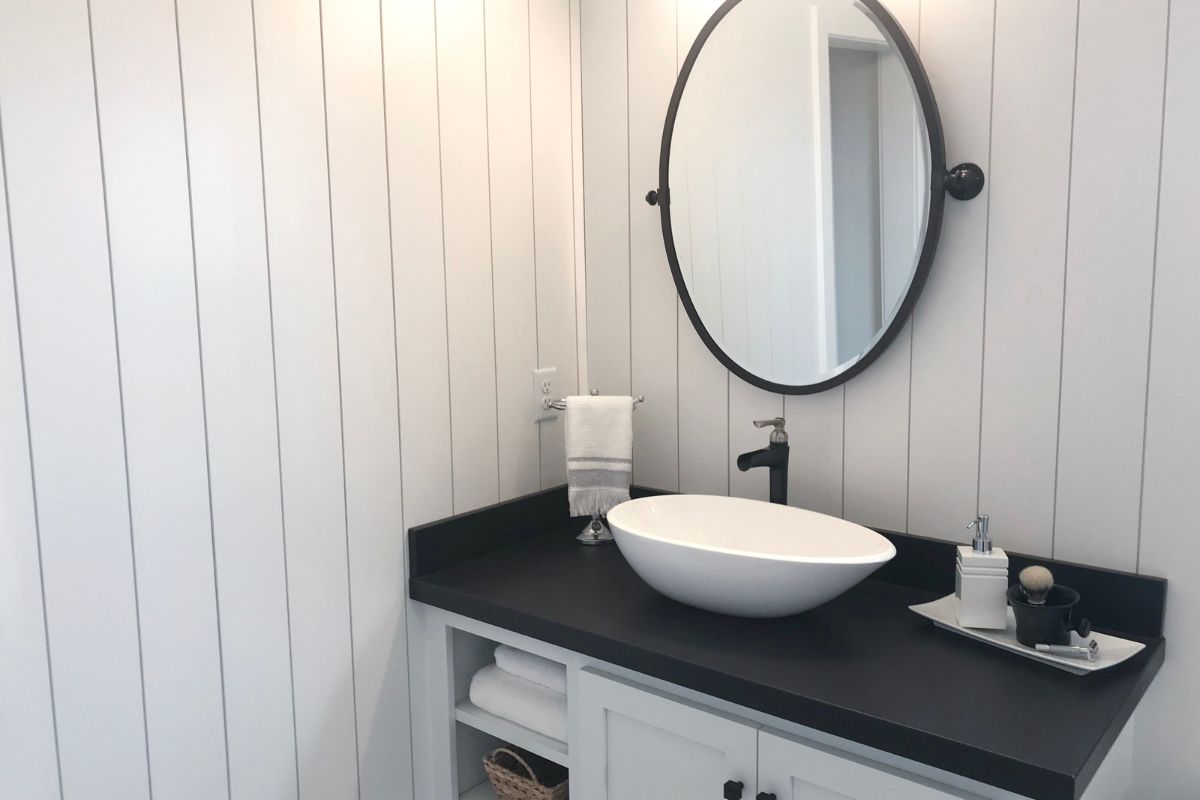
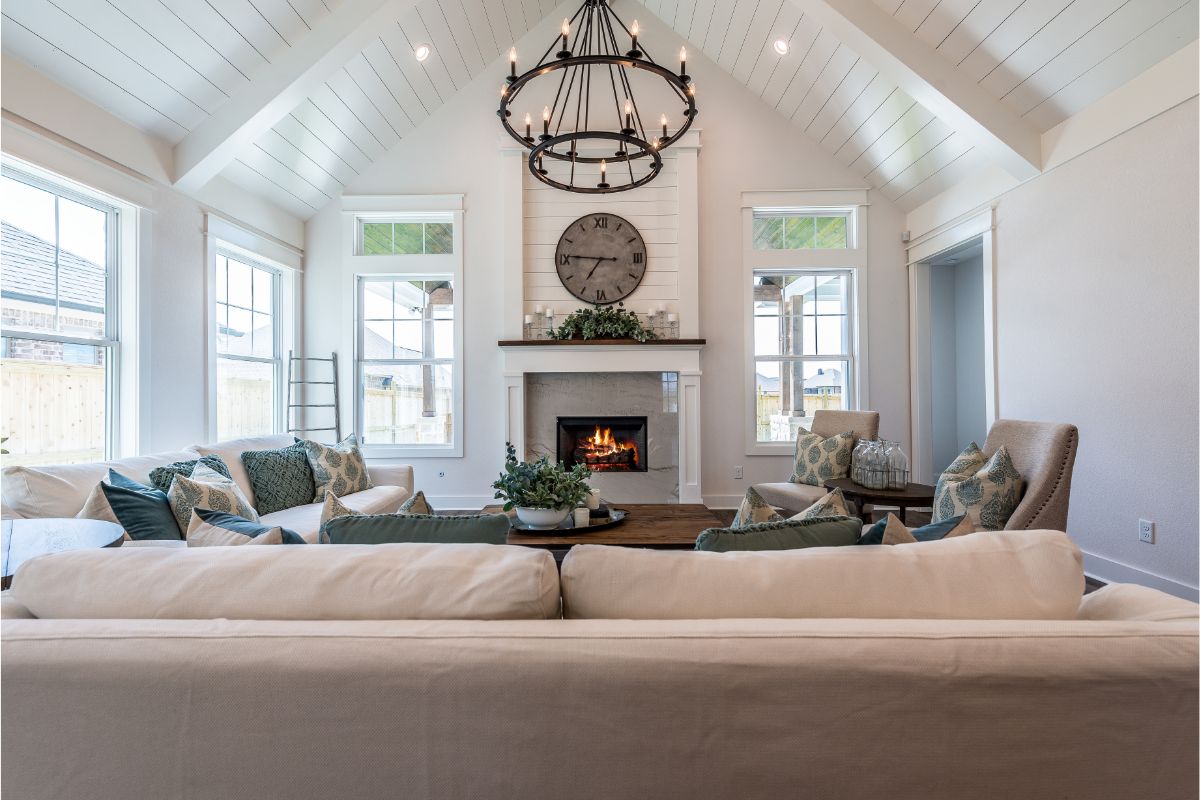
Placing these shelves against a background or a shiplap feature wall is great for modernizing an older room. The additional comfort of handmade materials also works to age newer spaces.
You can purchase an electric fireplace for this job if you don’t already own one. It’s best to look for one that will fit well within your existing space so you can then build your unit around it.
The Best Material To Use
If you’re seriously considering creating your contemporary fireplace and built-in bookshelves unit, there are many things you need to consider. One of the most important is the material that you use to secure your bookshelves to the wall.
Concrete hearths are pretty expensive so you may want to consider mimicking the floating mantel using wood to save a little bit of money. It also makes for a much more straightforward DIY job!
In this instance, you may want to opt for shiplap. It has some rabbeted grooves as key features that work to define the board. This will also stay well within your budget and look great all at once. What’s not to love?
Why Is Shiplap So Great?
We are going to assume that you haven’t been living in a cave and that you know exactly what shiplap is.
If this is the case, you likely also have a relatively strong opinion about whether or not it truly does add any value to a design.
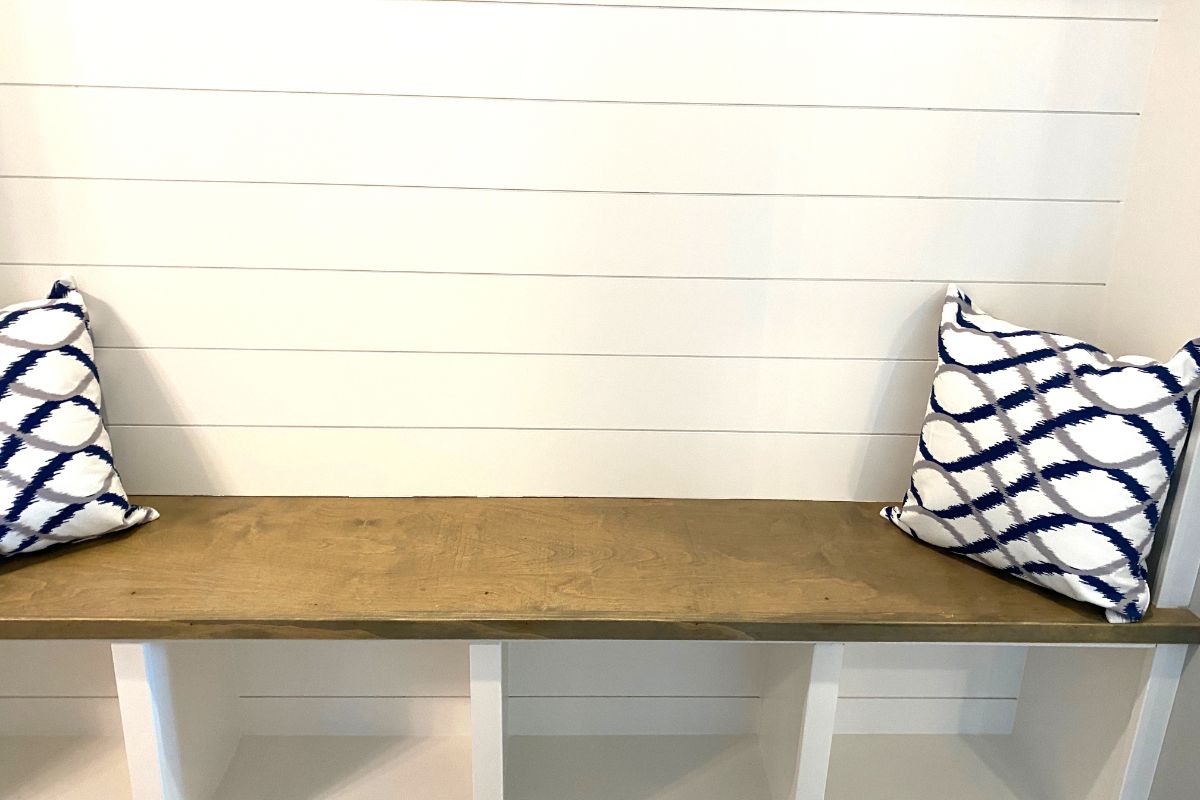
In layman’s terms, shiplap is a type of wood paneling that is characterized by long, wide cuts of wood that run horizontally across the wall.
It tends to create a very modern strong line and a squeaky clean texture that also generates a uniquely vintage, and almost hand-crafted feel that you’d usually only get with a bespoke object.
Homeowners and artisans alike often used to hand-make the paneling in older homes.
If you’re a little bit stuck on where to begin looking, your home builder will often have the knowledge to point you in the direction of relevant places where you can source these types of vintage supplies.
In recent years, shiplap has had a huge cultural moment. This was largely brought on by Joanna Gaines of HGTV’s Fixer Upper.
By now, many houses in the U.S. — and around the world — no doubt have this type of paneling somewhere in their home.
Not only is shiplap a solid wood that does wonders for decorating but it also adds an air of sophistication to any given room.
While it is slowly changing, this craze of using shiplap in the home shows no signs of going anywhere anytime soon.
So you can rest assured that it will continue to be used in various home DIY projects like this one.
How To Build Your Own Modern Fireplace Feature Wall
We are now moving on to the most fun part of the entire process, actually getting our design together! There are many steps to think about when you begin making your contemporary fireplace and bookshelves unit.
Fortunately, we’ve got it all figured out for you. Feel free to dive right in!
What You’ll Need
- 2 Billy/Oxberg Bookshelves From IKEA With Doors
- 2 Ikea Billy Bookcase Extensions (Optional)
- 29 Solid Pine 2×4s
- 8 Primed Pine 1×3s
- 4 Primed Pine 1×2s
- 2 Separate Sheets of Plywood
- Multiple Shiplap Boards (usually around 18)
- Two Boxes of Construction Screws (2.5-Inch)
- Box of Black Construction Screws (1-Inch)
- Wood Glue
- Crown Molding
- White Paint (Optional)
- Paint Primer
- 4″ Lag Bolt Screws
- Hearth: one 1×2 non-primed pine board and one Mastercraft edge glued panel board (pine).
- Mantel: two pine 1×4s, two pine 1×6s, and four 2×4s. For this project, they will be cut at four inches.
Tools
To finish this project, you will need these tools:
Official Instructions
1. Carry Out Research
You likely have some idea of what you want to do. Yes, you’d like a bookcase surrounding your fireplace, and yes, you’ve got a pretty good idea of how you want the final product to look.
However, you likely don’t know exactly how to get from this point to the end product. And that is okay!
Remember that no two fireplace bookcases are ever going to look the same. This means that even with this general guide, you’ll end up doing multiple things differently.
Before you begin, you should take initiative and look on the internet to find some reference images of fireplace bookcases.
You can also take note of the measurements of such references to see if the project you want to undertake aligns with the space you have at home.
2. Make A Plan
Another key step you must take is to make a thorough plan of action. You can start by creating a basic drawing of the available space and the type of bookcase you plan to insert.
Take the measurements of the wall space and make them as precise as you can. Here, it is vitally important that you correctly measure the wall and fireplace widths at the top and the bottom. You should also take note of the hearth width in the front and back.
The walls in your home might not be entirely straight which means that your fireplace hearth may not be entirely straight.
Fortunately, you can deal with this issue as you go along. However, you will need this information to ensure that your cabinets fit.
Our best piece of advice is to have some graph paper to hand and draw out as much as you can with all relevant information including measurements and materials. This will give you a better idea of what needs to be done.
3. Deal With The Lumber
If you do not own a table saw then it is in your best interest to enlist the help of a professional at a lumber yard who can cut all of the wood to size for you. This is a crucial part of creating the final overall look of your unit.
However, you should not get everything cut at the same time. Even the tiniest mistake in terms of dimensions early in the build means that you will either need to re-cut or completely scrap a lot of the available lumber.
4. Assemble The Hearth Box
One of the main things you must do is to determine what your desired hearth size is. The basic rule of thumb is to stick to the following equation: length x width x height to work out your dimensions.
Again, the hearth size will differ depending on the specific wall measurements of your own home. Make sure to measure everything correctly!
To give you an idea of what we mean, we’ll give an example of the measurements you will need if you are planning to build a hearth box.
For this specific example, we’re talking about building a unit with the following dimensions: 62″ length, 24″ width, and 12″ height.
If you have the measurements correct, then your next step will be to cut the 2×4s to size. With this example, these sections will need to be 62″ inches long. These will become part of the main box frame that you’re going to be building.
You should then cut eight 2×4s at approximately 21″ inches which must then be attached directly to the 2×4s you have previously cut to make the frame. Then, you can cut the 2×4s (12″ inches) which will work well in the vertical section of your hearth.
Your next critical step will be to assemble the box for your hearth using some screws. Make sure that you check for the square as you go using a level to ensure accuracy. You can also choose to use quality wood glue for a much stronger bond but it’s completely up to you!
(We’d recommend this extra step for some added structural security!)
5. Build The Box Frame
Now that you’ve successfully built the box for the hearth, it is time to turn your attention to creating the main box frame! This will sit directly on top of the hearth box, attached directly to the wall for stability. We will be abiding by the size example above.
You can start this process by cutting four 2×4s at around 78″ inches. After it has been fully assembled, the overall height of the newly created feature fireplace wall should stand at 90″ inches. This figure is achieved by adding the 78” with the 12” hearth height.
One thing to note is that this figure of 90” does not include any of the crown moldings you want to add on top.
Cut four 2×4s at 59″ inches and then attach them to the four 2×4s at around 78″ at both the bottom and top. This will help you to create 2 distinctive rectangular boxes.
You must then cut two 2x4s (at 59 inches) and attach these to the very back end of the frame. Here, they will be situated 24″ inches from the bottom and the top. They will also help to successfully secure the whole box to any wall studs.
For more structural support, cut an extra 2×4 exactly at 59” and attach it to the middle of the frame at the very back end.
Once the frame of the box has been placed on the box for the hearth, you may want to consider adding an extra two 2×4s cut at exactly 14″ inches for even more structural support. Now, your box frame must ideally be situated flush to the hearth box after it has been correctly assembled.
Feel free to add more of the 2x4s for more structural support if and when it is needed!
It should now look something like this image below.
6. Add Extra Framing
Another step you may want to consider is adding extra framing bits to the aspect of the box directly above the spot where the mantle will eventually go. Here, you can add a television in the future or you can add some of your favorite decorative bits to it. It’s completely up to you!
If you are primarily planning to add a television, the most important thing you must get right is the height at which you hang the TV. It’s entirely safe mounting one above an electric fire as the heat is pumped outwards instead of upwards.
To achieve this final effect, you can cut five 2×4s at around 32″ inches. Again, this measurement will depend on the space you have available in your home.
Cut an extra 2×4 board (at 59 inches) to act as the anchor for the bottom where any additional boards will attach directly to the structure.
7. Install Electric Fireplace
The next step is to tackle the frame that your chosen electric fireplace will eventually be inserted into. The frame that your electric fireplace will fit into depends on the brand and type that you choose.
The key is centering the frame between the bottom of the mantel and the top of the hearth. It should then be attached using screws to ensure that the entire frame is secure.
Ideally, you must have at least one electrical outlet installed in the wall located directly behind where your fireplace is. This will make the process of setting up your fireplace and other electrical items much swifter and easier.
If you do not have one of these units installed, it doesn’t cost much to bring in an electrician and have an extra circuit added!
8. Mount The Structure To The Wall
It is now time for you to mount the structure so far to a wall. Make sure to mark out the center of this wall and the official hearth box so that you can guarantee that everything is properly aligned.
Here, it may be in your best interest to take away the baseboard directly behind where the hearth box you have created is so that your construction is situated flush to the wall.
You can begin this step by attaching the base with strong bolt screws. This secures it directly into the wall studs. For some added security, you can even add some washers. It is completely up to you whether you do this or not, but it won’t hurt to have some more security!
After it has been properly centered, you should mark the wall studs while also pre-drilling some holes into the several 2×4s already standing on the frame. This should be completed before you consider attaching it to the wall.
This is a great way of ensuring that your boards won’t split apart at any point during the creation process or when everything is all set up. Secure this again using bolt screws to make sure the base of the hearth is flush with the wall.
9. Cut The Plywood
Plywood is a pretty easy material to cut and shape into your desired structure. This means that it won’t take you a lot of time to complete, which is great if you are planning to get your new feature wall completed in a shorter time frame.
You should cut the plywood to snugly fit the top of the base of the hearth and then attach it using screws.
Your next step is to move the top aspect of the frame and put it on top of the base so that it sits flush with both the wall and the base. This step can be a bit tricky so it’s best if you have someone helping you out to ensure accuracy and to prevent injuries from occurring.
Screw this top part of the frame into the hearth base with around a couple of screws and then attach it straight to the wall using four lag bolt screws (two positioned at the bottom and the top) while making sure to place them into the wall studs you have already placed.
10. Add Finishing Touches
You should now attach the subsurface you have decided to use. As previously specified, we have chosen to use shiplap as the finishing material. Because of this, it is relatively straightforward to encase the whole frame you have made using a light material like plywood.
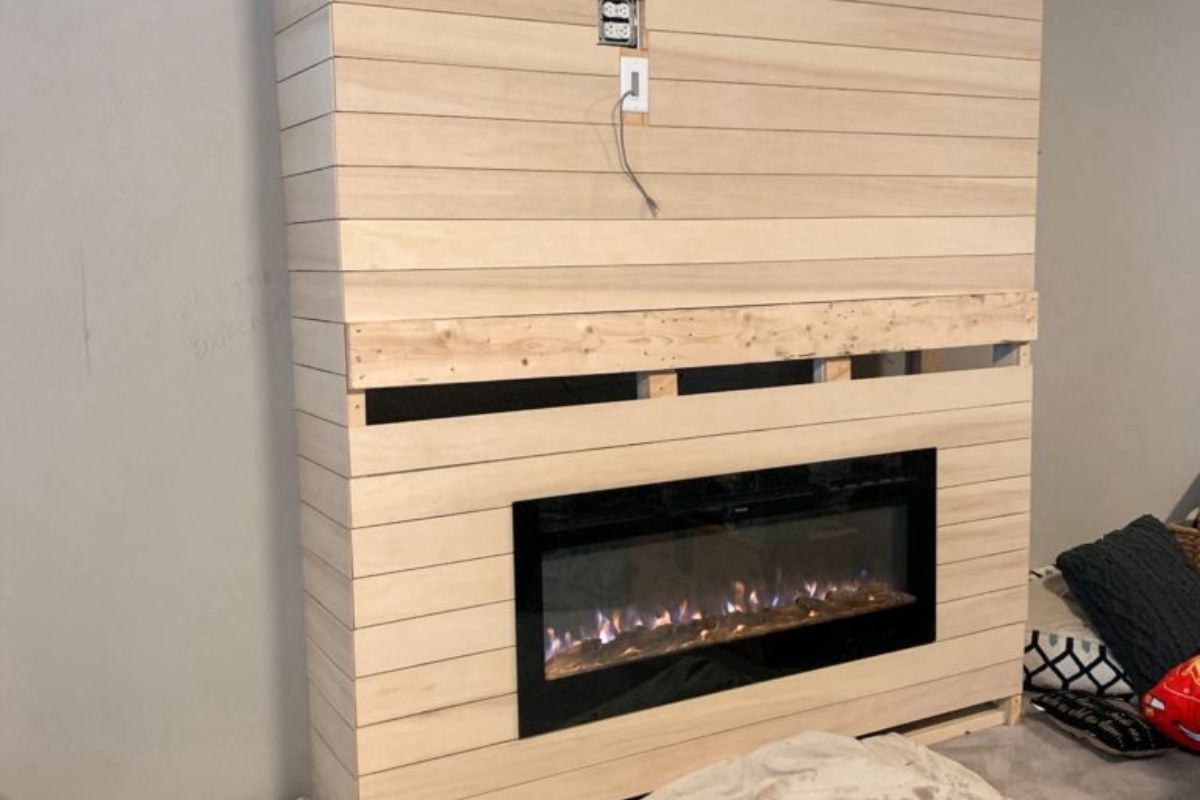
Note: This is not our image but it is an accurate representation of what the surface of your fireplace structure should look like at this stage. We have not yet reached the step where the electrical fireplace is to be added, which is situated down below.
Here, if you have opted for a stone veneer instead, you will need to use an approved and relevant interior substrate such as drywall.
After the whole frame has been encased with a substrate surface (in this case it is the plywood) you can then proceed to hang a floating mantel which finishes the overall look. We will discuss this in more detail below.
11. Install Shiplap
Once you have attached the mantel to the unit, you can then directly install the shiplap against any plywood substrate. It’s a perfectly safe material to use for your fireplace surround as long as you follow all of the correct safety codes.
When installing it, you can choose whether or not you want to move the shiplap straight to your wall. For this design, it’s recommended not to do this as you will be attaching some bookcases to both sides and want to make space for them.
If you are not planning to attach any IKEA bookcases in this design, you can simply go ahead and take the shiplap straight to the wall. This will give the overall appearance of this unit a much cleaner and more efficient appearance.
12. Mount The Hearth
After you have finished installing any shiplap, it’s wise to begin mounting your chosen electric fireplace onto the frame. It is a good idea to follow all of the manufacturer’s instructions on your chosen fireplace which will give you the exact opening dimensions.
Once the opening of the fireplace has been framed, you can shiplap all around the opening. If it aligns with your vision for the final product, you could also paint this area a darker color so that it stands out more against the bookshelves you will be installing.
Now, all that’s left is mounting the hearth and THEN attaching the bookcases.
To properly build a wooden hearth, you must cut pine planks down to the depth that best fits the hearth. Here, 12” is the ideal depth.
Consider adding around an inch overhanging on either side and then attach some 1×2s there and to the front so your hearth looks much thicker. You can attach it to your plywood using screws that mimic the hardware commonly used to secure a floating mantle.
13. Build Your IKEA Bookcases And Extenders
After the hearth has been successfully installed, you can begin preparing to install your bookcases.
We’ve selected IKEA Billy bookcases for this purpose as they are inexpensive and very easy to put together and install. They also offer a lot of space for practical storage which will help to clean up the space a little bit.
They are also pretty tall and will stretch a considerable distance upwards. You’ll want your built-ins to go as far up as possible on the wall to really make the most of the available height and to also immediately draw the eye upward.
This step where you assemble the bookcases should take you very little time if you follow the instructions set out by the manufacturer.
Depending on the height of your ceiling, you may want to consider adding multiple extenders — or simply as many as you need. If your ceilings are 8ft, for example, you will only need one extender.
Once they are put together, remember to secure them to the studs in the wall so that they don’t tip over.
14. Add Baseboard Trim Around The Bookcases
To achieve an authentic and highly custom “built-in” look, you will want to extend the baseboard around your chosen bookcases. You may want to think about removing the trim attached to the wall and then cutting a 45-degree mitered edge, following all around the bookshelves.
If your goal is to make the bookcases look like they are built-in, you can opt to remove the established baseboard for the shelves and then build a small raised platform using 1x3s (around 3/4 inch off the floor).
It may be in your best interest to build the same type of platforms for the very top of your bookshelves to keep things looking even. Plan to make four of the platforms at once, two for each of the bookcases, if you’d like to save a little bit of time.
15. Add Trim And Top Moulding To The Unit
This is where a lot of the magic will happen! You can use 1×2 pine boards and attach them directly to the face of the cabinet. Not only does this give the whole project a much more customized look but it also works to bulk up the overall appearance of the shelving.
For the shelves, it’s important to keep the shelf board flush and allow the additional length of the wood to hang down a bit lower than the shelf itself does.
If your living room already has a lot of crown molding then you might want to continue it around the bookshelf much like the baseboards.
16. Add Spacer Boards
Once the platforms have been attached to the base of both of the Billy bookcases that you have built, it is time to officially install any spacer boards. These are wooden frames that play a huge role in supporting the weight of the bookcases that you have installed.
The spacer boards will sit nicely between the electric fireplace and also your bookcases.
This specific set of instructions leaves room for a small overhang on either side. This means the bookcases need to be situated a short distance away from where the fireplace is to make sure that the doors at the bottom of the unit can swing open easily.
If you want to make a wooden spacer, all you need to do is cut wood down to size. For instance, you can cut a piece of 2×4 down to size and then attach a few boards measuring 1×3 cut into 6-inch pieces to its side using pocket screws.
This can then be screwed into any studs that have been placed on either side of the feature wall.
After you have successfully been able to install your spacer boards, it is now time to secure your Billy bookcases.
17. Add Your Bookcases Into The Mix
Now it’s finally time for you to add your bookcases into the fray! By this point, you should have already built the bookcases according to the manufacturer’s instructions, and the space should be ready to slot them right in.
Stand your bookcases up upright, making sure that they are all flat to the wall. They should also be completely square against all of the spacer boards you have made. It’s important that you then take time to mark out the depth where a spacer board remains adjacent to the bookcase.
You should then drill some holes in the Billy bookcase, all spaced evenly, to successfully attach each of the bookcases to any spacer boards.
Utilize the counter-sink bit after drilling these holes so you can successfully use caulk after finishing to correctly fill in any holes and carry out a quick painting touch-up if it is needed. This will make the entire effect look effortless, and will draw everything in together.
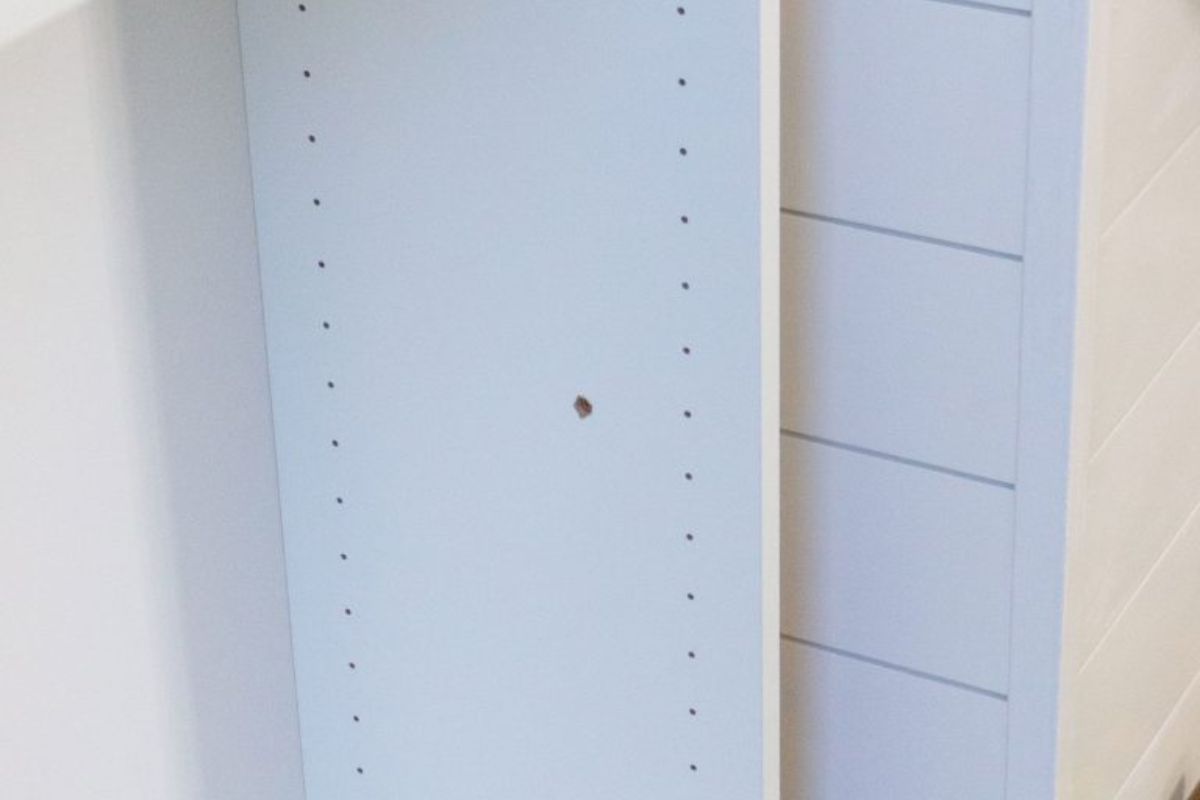
At this stage, do not panic if a slight gap remains at the very bottom of your bookcase! A quick fix is to cut the baseboard down to size, adding a 1×2 to fill in the gaps. Again, once things have been properly caulked, primed, and painted, nobody will ever be able to tell the difference!
18. Add Crown Molding
Once your bookcases are in place and secured, it is time for you to begin adding some of the final decorative and structural finishes.
At this stage, you may add your very own crown molding on the top of the units. You must also secure the bookcases using the anchors provided by IKEA to make sure that the unit has complete structural integrity and that everything looks built-in.
Your next step is to re-attach the baseboard. Once this is done, you can proceed to the next stages of your build.
19. Caulk
Caulking is a highly flexible material that is typically used to seal air leaks through gaps, joints, or cracks that are less than a quarter inch wide. It is usually only used for stationary building materials and components.
Before you caulk, it’s important to make sure that every bit of framing of your shelves is perfectly in place. This includes any trim, baseboards, and crown molding. After caulking, you will not be able to shift things around nor will you want to once everything has been smoothed out.
Caulking will help you to smooth all of the seams and edges of your unit to ensure that it all looks perfect. Feel free to use caulk along the corners of each bookshelf.
Ideally, it’s best if you opt for a paintable caulk. Especially if you want to give your DIY project an extra air of sophistication!
20. Prime And Paint
We’re not going to lie, painting IKEA furniture isn’t the easiest thing in the world. This is because of the materials that are designed to make it tough for the paint to adhere to properly. Yet a coat of primer could make all the difference!
We’d suggest using two coats of quality primer to ensure that all of the coats of paint adhere properly to the furniture. Make sure to choose a good white paint and paint approximately three coats to make sure the color sticks.
You can alter this step at any time according to the specific demands of your color needs.
21. Attach The Doors
If you haven’t already done this, then the last step will be to reattach your doors to the bottom of your Billy Bookcases. You can even add some new hardware to give it a bit more character but this is completely up to you!
This will act as the central storage element of your DIY custom build, allowing you to save space in this room within your home.
22. You’ve Officially Reached The End!
And you’re officially done! Say goodbye forever to boring and completely blank white walls, and hello to a customized electric fireplace feature wall with built-in bookcases, lots of space, and endless personality!
This image is not ours but you get the gist! This is the sort of look that you should have achieved. Again, you can change up the color combinations as and when you want to. We have stuck with white to show off the modern elements of this DIY project and design.
The Average Cost Of This DIY Undertaking
In total, you may be looking at around $800 for everything including the cost of the electric fireplace, the paint, and the bookshelves themselves. However, the exact cost of your DIY undertaking depends on the type of materials that you source for your project and the finished look you are intending to achieve.
Realistically, you will not be spending considerably more than this on your unit. Even if you did, you would still be saving on the overall costs versus a fire suite from a specialist store! Plus, it’s a completely custom build which means it’ll match your vision and budget perfectly.
We must warn you that it will likely also take you a considerable amount of time to finish the project depending on your experience and the amount of time you have to dedicate to getting the job done. Yet you could realistically build the unit from scratch in only a weekend or two.
Again, the timeline is completely up to you and will range differently for everyone who tries this DIY project.
The Final Look
All things considered, this is a pretty straightforward DIY project that not only looks elegant, timeless, and beautiful but will also do wonders to save you a considerable amount of money instead of purchasing a pre-made unit.
The affordability of the Billy Bookshelves only adds to the savings you will have as opposed to completely building your bookshelf from scratch. Buying these units from IKEA (You might want to check out IKEA Moppe Hacks You’ll Love) will also save you a considerable amount of time that you can dedicate to other elements of the project!
Even with everything set up according to your vision, you may not have achieved the final look for the room yet. And that is completely acceptable! Like any other room in your house, you’ll likely be playing around with the decor arrangements and furniture until everything clicks into place.
Whatever you are feeling, the room that this unit is now situated in will look and feel so much cozier for the colder months. It will likely become your favorite place to sit, have a quiet read, or simply relax from the stresses of daily living.
Conclusion
And that’s all there is to it! Granted, there are quite a few steps that you may find tricky at times, including those that revolve around measuring the wood, fixing mistakes, and measuring specific dimensions.
This is especially true if you don’t have any prior experience with any type of DIY project, big or small. However, with the guidance and instructions provided in this article, you should be able to get started on your new in-built fireplace and bookshelf unit with little to no hassle at all.
Regardless of how difficult it may seem, the results of this DIY undertaking are more than worth it!
- The Woodworkers Guide to Brad Nailers: Everything You Need to Know - September 25, 2023
- How To DIY An Aztec Garden Dining Table [The Easy Way] - October 18, 2022
- Farrow & Ball Pigeon: Is It Right For Your Home? - October 17, 2022

