Headboards can be a great way to finish off your bed’s look. They can take a bed frame from looking like a mattress on the floor to looking like a proper, grown-up bed.
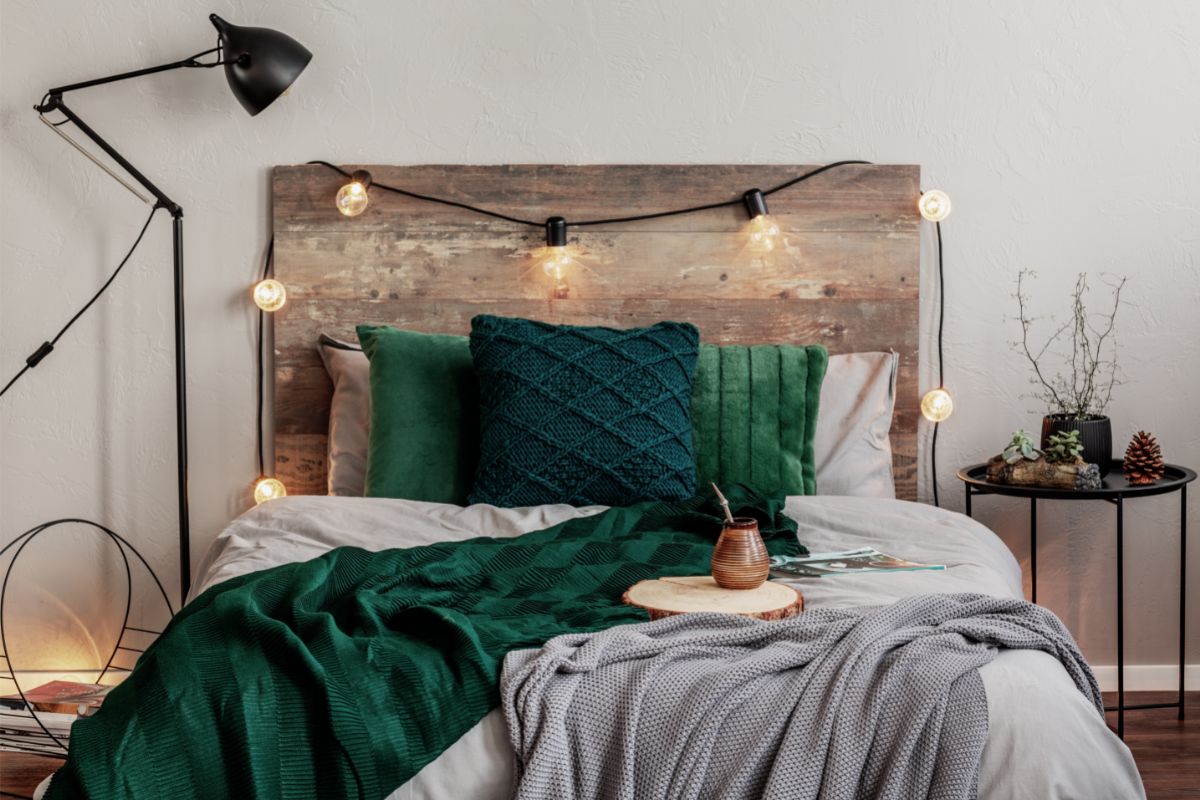
Some headboards come in a huge range of styles, from basic padded headboards in neutral colors to grand, carved wooden designs. Wooden headboards bring an element of style and rustic air to any bedroom, no matter how inner-city your home is.
However, beautifully carved and finished headboards can often break the bank or be completely out of budget for many people. Thankfully, there are a few ways that you can make your own wooden headboard for a fraction of the cost.
In this article, we will look at 5 easy DIY wooden headboard ideas for your bedroom.
Why Should You Make A Headboard?
There are a few reasons why it is worth making your own headboard. One of the biggest reasons is to save a vast amount of money. Purchasing headboards can be expensive, especially if they are made from wood.
Another great reason why you should seriously consider making your own headboard is that you can make it entirely to your own specification. You can create a beautiful headboard that is totally unique.
Not to mention the sense of pride you can have from having made a piece of furniture that is in your home. Whatever the reason for deciding to make your own headboard, it will be worth it in the end.
DIY Reclaimed Wood Headboard
This DIY reclaimed wood headboard is a great place to start if your woodworking skills are a little bit rusty. There is no construction required for this headboard so you won’t have to worry about refreshing your knowledge of joints and fixing parts together.
One of the hardest things about creating this headboard will be sourcing a piece of wood that fits the look that you are going for. However, with a bit of searching, you will be able to find a beautiful piece of wood that is big enough for your bed.
Once you have sourced your piece of wood, you can shape and finish it until you have achieved your perfect look. This can involve sanding off any rough edges that could catch on your hair, skin, clothes, or bedding.
Once you have smoothed any areas necessary, you can add a stain or varnish to the wood. A stain can help to achieve the look that you want to help fit the rest of your bedroom.
Varnish can help seal the stain or simply provide a beautiful shine to the natural color of the wood.
Depending on the size of the piece of wood, the headboard can be placed on the floor behind your bed frame so that it forms a typical headboard piece. If the piece of wood is smaller, you can affix it to the wall at the right height to create a useful headboard.
Even if your piece of wood is large enough to reach the floor, it should be secured to your wall to prevent injury or accident. This can be done with glue or screws.
DIY Barn Door Headboard
If you want to keep your woodworking skills to an absolute minimum, a DIY barn door headboard could be the way to go. Depending on where you live, the sourcing of a barn door could be difficult or super easy.
However, thanks to the internet, you can pretty much purchase a barn door from anywhere in the country. The most important thing when looking for a barn door is to double-check the size of the door.
If you purchase one that is too big it might not even fit inside your house, let alone behind your bed.
Once you have sourced your barn door, the amount of work that you need to do to it will depend largely on the condition of the door that you purchase.
Some doors will need nothing more than perhaps a stain or varnish before they can be placed behind your bed and affixed to the wall. Others will need to be sanded down a little and have the edges fixed up to help the aesthetics of the door.
You can also use the original hinges of the door or source some high-quality vintage ones to add to the overall look.
Again, the barn door should be securely fixed to the wall to help avoid accidents and injury. You can find out how to do this in the tips and tricks below.
DIY Pallet Headboard
If you want a DIY wood headboard that takes a little bit more work to achieve, a DIY pallet headboard could be the option for you. Wood pallets are fairly easy to come by, many businesses and industrial sites will have them lying around.
Often, you can obtain a pallet or two completely free of charge or for no more than a few bucks.
The first step in making a beautiful DIY pallet headboard is to dismantle the pallets that you got. It is sensible to get more than one pallet to ensure that you have enough slats.
Depending on the quality or condition of the pallets, some of the slats may break when you are dismantling them or may be rotting and not suitable for a headboard.
Once you have dismantled the pallets and gathered the slats that will work best for your headboard, you can stain and treat the wood to get the desired visual appearance.
When the slats have been treated and are looking how you want them to you can simply arrange them in the shape or pattern that you want them to be.
Once you are happy with the way that they look, secure them in place with strong wood glue. You can reinforce them with small screws for added peace of mind.
DIY Log Stump Headboard
This DIY wood headboard will take a little more effort in terms of resources and skills. A headboard made of log stumps creates a beautifully stunning visual effect that will make you feel like you’re sleeping in the middle of nature.
If you love the outdoors and wish you could wake up surrounded by natural beauty, this is the ideal headboard for you.
In order to make this headboard, you will need to source multiple tree stumps that you can cut into smaller disk-shaped pieces. If you are handy with a chainsaw, you can do this step yourself, if you are not, you can get someone else to create the disks that you need.
To achieve the best effect with this headboard, you should use stumps from multiple trees to obtain different wood grains and patterns. Simply varnish and arrange the stumps into the pattern you want, secure them with glue and screws, and attach the board to your wall.
DIY Branch Headboard
This headboard is one of the simplest options on this list but the effect that is created is beautiful. All you need to create this DIY branch headboard is to gather some small tree branches.
For the most natural and rustic vibe, you should leave the branches almost completely untouched. Embrace their natural shape and their bark, if you want to remove any dirt you can simply tap them on the ground to make it fall off.
Simply arrange the branches into any pattern that you want and secure them with wood glue and nails. The more hidden the nails, the more natural the headboard will look.
You can add to the aesthetic of this headboard by adding fairy lights once it has been installed.
Tips And Tricks
To ensure that your headboard stays looking fresh and beautiful, adding a layer of varnish to the wood can make it significantly easier to keep clean. It will repel stains and make dusting a much easier task.
Proper application of strong wood glue and nails will also help to keep your headboard looking as good as the day you made it. Every point where two pieces of wood touch should be reinforced to ensure that heavy pieces of wood don’t end up falling.
If you like the wood effect of these headboards but want to add a little extra color to them, wood paint can be incredibly effective. If you like the grain of the wood but want to add extra color, using light-colored paint can help keep the graining but brighten up the room.
If you just want a pop of color you can add paint to specific parts of the headboard. This can highlight the natural ridges and nodules of the wood.
Alternatively, you can paint natural patterns on the wood such as leaves and flowers to add color while maintaining the natural vibe.
Final Thoughts
DIY wood headboards can be a fun and challenging project to bring some individuality to your bedroom. These 5 headboard styles are easy enough to make yourself with very little woodwork experience.
- The Woodworkers Guide to Brad Nailers: Everything You Need to Know - September 25, 2023
- How To DIY An Aztec Garden Dining Table [The Easy Way] - October 18, 2022
- Farrow & Ball Pigeon: Is It Right For Your Home? - October 17, 2022

