Have you ever wanted to make your own farmhouse table, which has its own benches to match? This guide will talk you through exactly how to make a project like this.
It’s a pretty big and involved undertaking, so you will want to make sure that you are fully prepared, which is why we have put this guide together so you will know exactly what you are doing.
And compared to some other carpentry projects, this is not as hard as some others, so it is a great project to try if you want something which is super practical, and fits a lot of indoors and outdoors spaces.
This project is so simple that you can make it just using standard lumber which you can buy from any hardware store, some tools which are not too hard to source or rent, and plans which we will set out for you here.
If you want to do this job in the background, on and off, it should take you about a week which in the grand scheme is not too bad. And once you are done the benches and table will be level, sturdy and super strong!
What we think is best about the plans for this set of table and chairs is that it is designed to be not that hard to disassemble.
So if you want to move it to different rooms or spaces, you will not have to carry all the massive assembled pieces, and instead be able to split it up to make it a lot more manageable.
This is great if you can not commit to choosing a place for your furniture to go, and scared of choosing the wrong place and having it stuck there.
We just want to reinforce that this project is super beginner-friendly compared to some other woodworking projects, and while some parts may be difficult if you do not have the foundational knowledge, filling in the gaps should not be too hard!
This project was done not just with limited knowledge but also with pretty limited tools available, so if you are an experienced carpenter, this project should be a breeze!
But this is a great table to have, and since all of its inner workings are pretty exposed, any of its faults are part of its charm, and will help remind you that it was made by yourselves.
If you wanted perfect flawless factory made furniture, you can buy it easily, but going to the effort to make something like this, really adds the soul which makes this furniture easy to love.
This is also a pretty customizable project, you can choose whichever stains and wood colors you like, as long as the wood is sturdy enough.
If you are worried about the sturdiness of the wood, the best thing you can do is ask at your local hardware store if the wood you want to use is appropriate for this project, and if it is not, you can ask for a recommendation for one which is!
So, if you want to try your hand at this carpentry project, but you do not know where to start, this guide will walk you through the entire process so you will know everything you need to do and in what order.
So if you like the look of this table and bench set, keep reading!
Why Build Your Own Farmhouse Table With Benches?
So why exactly did we choose to make a farmhouse table and benches instead of any different table and bench combinations, and why should you.
Of course, there is the obvious reason we alluded to in the previous section that it is a more forgiving carpentry project with mistakes not being as egregious if you do not know how to fix them, and they tend to match the aesthetic, but this is not the only reason!
Another problem is that it is quite hard to find a farmhouse table and benches to go with it at a reasonable price, as well as getting one which looks good. This is why we prefer the approach of making it yourself.
This means that you will save some money, learn some new skills while making it, and it will likely look better than a store bought product in the end, with you are able to completely tailor the aesthetic of the final product to your desire.
When investing in furniture like this, you want to be completely sure that you are happy with how it looks and feels, and when you are buying it, you will likely have to make compromises.
But when you are making it yourself, you do not have to worry about this and you can have the bench and table look exactly how you want. This can make matching this centerpiece with your decor and color story significantly easier too!
To give you an estimate, the tools and lumber which we had to buy for this project ended up at a little under $500, which is significantly less than you would have to pay for a bench and table set of this quality, and if you were paying that much for a bench and table set of this aesthetic, you should make sure to check its quality and reviews.
So, what exactly will you need to get started on this project?
Tools You Will Need For Building Your Farmhouse Table And Benches
The tools you will need to get started on this project are:
- A kreg jig, if you invest in this, you will manage to save yourself so much time and it will make this project significantly easier! By getting one of these you will be able to drill your own pocket holes with will be perfectly angled for what you need them for and will not end up being too visible in the final product. Getting this product honestly feels like you are cheating, and if you are a beginner, this will make the whole process, so much easier!
- 150x 2 and ½ inch pocket hole screws which are used for the holes from the kreg jig
- 50x 2 inch wood screws
- 100x 3 and ½ inch wood screws
- 25x 4 inch number 2 10×4 inch construction screws]
- 8x L brackets, 6 inches long in both directions
- 24x 5 inch bolts
- 24x nuts make for fitting these bolts
- A cordless power drill
- A cordless impact driver
- Good quality wood glue
- A miter saw
- A carpenter’s square
- A level
- Measuring tape
- A socket wrench
Supplies You Will Need For Staining And Finishing Your Farmhouse Table And Benches
As well as the tools, you will also need supplies for this project, these are:
- Some pre-stain conditioner
- Stain of your color choice, make sure to think this through as this will not be easy to change when it is constructed. Make sure to do plenty of test on the wood you are choosing to use, this is something which should be heavily considered as it will heavily impact the aesthetic of the final piece
- A matte top coat for the stain
- Some old rags
- Gloves
- Some 150 grit sandpaper, you can start with a 150 then go onto a 320 if you want a perfect finish, but this is by no means something you have to do, so just 150 will work fine
- And plenty of patience, especially if this is your first project like this
Dimensions Of The Farmhouse Table And Benches
This bench set was designed to be a little higher than an average farmhouse bench, mainly for it to be more comfortable indoors, and to feel a little less cramped than some outdoors farmhouse benches to be.
If you want to make it shorter, all you will have to do is shorten the legs and then it will all be closer to the floor.
When finished the dimensions for the project we are making are:
- The table is 115 inches long, 46 and a ¼ inches wide, and 30 and ½ inches high
- The benches are 96 inches long, 14 and ½ inches wide and 19 and ¾ inches high
Tip For When You Are Buying Your Lumber From A Hardware Store
When you are buying lumber for this project, you will want to ensure that you are going after the straightest boards you are able to find.
You want to make sure to dedicate the most time to getting the perfect lumber for this project, as this is the basis of the design. You want to ensure that the boards you are using are not warped at all and have as few cracks as possible.
You will also want to lay all of the pieces which will be the top boards together to make sure they match each other and will fit in, the top boards are the pieces which will be on top like the table-top or the bench top.
Occasionally you will find that even if you find 2 boards which are straight, will not actually line up together, you need to ensure that they do otherwise your table and benches will end up being crooked.
So when you are choosing the lumber for this project, make sure to pay close attention to the lumber which you are choosing.
Lumber List Of Supplies
Keeping in mind the advice from the previous section when you are making your selection, the lumber you will need for this project are:
- 7 pieces of 1x10x8 for your table top
- 4 pieces of 2x8x8 for the top of the benches
- 2 pieces of 2x4x10 which will be used for the under frame
- 9 pieces of 2x4x8 which is used for other frames as well as the cross brace
- 7 pieces of 4x4x8 which is used for both the bench and the table legs, this is one of the more awkward parts of the process, because of this, while only 6 pieces are needed, getting 7 is a good idea for having a spare which will likely be needed.
- 2 pieces of 1x4x8
List Of Cuts Of Lumber Needed
To save having to keep running back and forth from the saw, the best way to save time in this process is to do all the cuts you can at the start to make the process significantly more efficient.
If you do this, making all the cuts will feel a lot more natural and make the chance of any mistakes much lower if you are prepared.
There are a few cuts which will be difficult to cut in advance for different reasons, but most can be done in advance. Make sure you are fully confident before making any cuts, as of course, these are difficult mistakes to recover from if you do something wrong.
The cuts of lumber you will need for this project are:
- 2 pieces of the 2x10x8 cut into 46 and ½ inches
- 2 pieces of the 2x4x8 cut into 111 inches
- 5 pieces of the 2x4x8 cur into 36 and ½ inches
- 4 pieces of the 2x4x8 cut into 87 inches
- 6 pieces of the 2x4x8 cut into 9 inches
- 4 pieces of the 2x4x8 cut into 6 inches
- 6 pieces of the 2x4x8 cut into 10 inches
- 8 pieces of the 4x4x8 cut into 18 and ¼ inches
- 2 pieces of the 4x4x8 cut into 18 inches
- 4 pieces of the 4x4x8 cut into 43 and ½ inches including 45 degree back cuts
- 4 pieces of the 1x4x8 cut into the length of your small side including 45 degree cuts to the 4x4s before this
- 4 pieces of the 1x4x8 cut into 4 inches
Making The Farmhouse Table And Benches
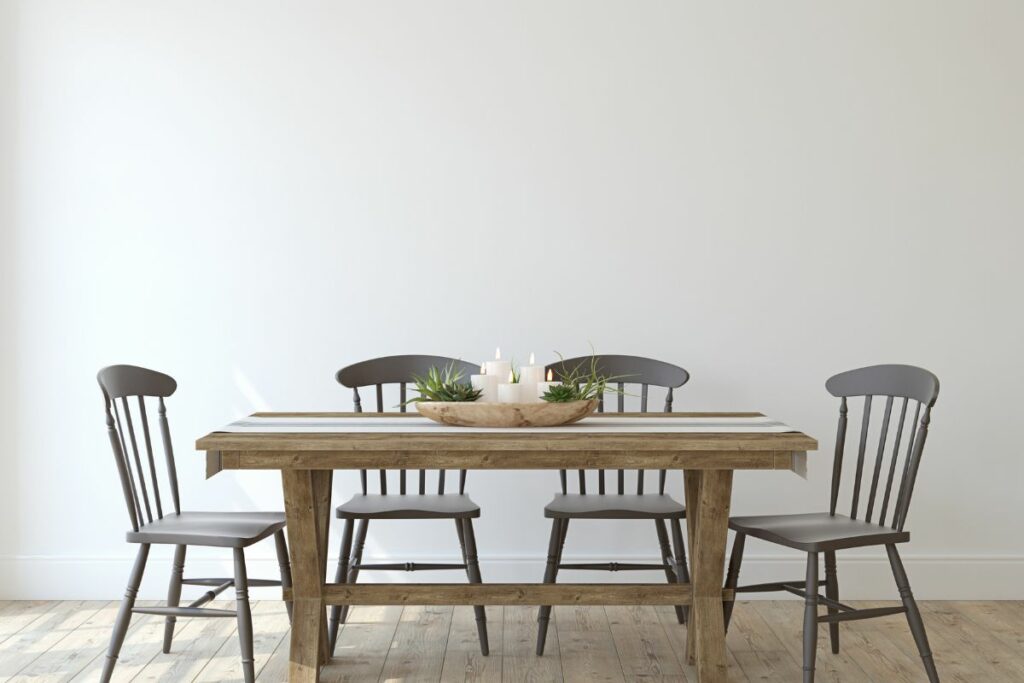
We will now be going through the process of making and putting the benches and table together, make sure to read this closely before making any moves as having this extra preparation will make everything feel a lot more natural and will help avoid mistakes.
Part 1 – Planning And Getting The Materials You Need
When it comes to making a project like this, there is a shocking amount of variety when it comes to different table designs to go with.
Things like considering the height, how to match the chairs, and the best length and width all need to be thought about.
While the default height we are using for this project might be a little high for some people, it can be adjusted afterwards, whereas erring on the side of short is a lot harder to fix.
After you have gathered the materials which we have listed in the previous section, we found it easier to draw out the plans which we are going to follow. This will help you visualize the process and make it easier to work towards the goal.
Gathering the pieces of lumber together, so everything is grouped with the piece it will end with will make putting them together much easier in the end.
Part 2 – Making The Benches
Before we started with the more challenging tables, we warmed up with the benches. The benches are quite simple and put together like mini versions of tables.
This makes them easier to work with, and will teach you some techniques which will be useful for when you are working on the table, just with lower stakes.
For the bench top you will want to cut 2 of your 2x8s to identical lengths and then connect with kreg jig screws and wood glue in between. Next put the legs in place and then re-measure to ensure cuts are correct.
You can attach the 4×4 legs with kreg jig screws on the inside faces so they will not show up. Then we will attach the 2×4 pieces to be between the screws into the legs and down into the underside of your bench top.
These particular 2×4 pieces will be integral to the strength of the bench. Not all you have to do is repeat for the second bench!
Part 3 – Building The Top Of The Table
With the bench top as experience, the table top is actually pretty easy with this in mind.
When using the kreg jig to connect the table top pieces together you want to make sure to mark out the spots where the screws will connect to each other and ensure that your pocket holes will be placed under the table top instead of above.
After the kreg holes have been fully drilled you will be able to assemble and put the pieces together using glue and by connecting the pocket holes you have made.
After the top of the table has been completed you want to work on the 2×4 under frame of the table. This is best to do separately.
The two 2x4x10s at 111 inches are the side pieces which will support the length of the table top, then use the cross pieces to connect this with the table top.
Before you start making connections you want to ensure that you are checking for squareness and accuracy as well as the levelness.
Make sure you are confident when connecting the under frame together as it is gives the tabletop its structural integrity.
Part 4 – Building The Base Crosspieces
This is likely going to be one of the more complicated parts of the process as cutting the 4x4s to the correct size can be quite difficult, especially with a saw which may not be designed for this role.
But you essentially want to be attaching the 4x4s in an X shape with a vertical piece through the middle.
Once you have the pieces cut correctly, fitting it all together is now too hard using your 4 inch screws and wood glue. The diagonal pieces will be directly glued and screwed into the center post to aid with the structural integrity.
Part 5 – Building The Centerpiece Of The Base
This is a pretty easy stage and all you need to do for this part of the bench is attach the straight 4x4s with the angled 2x4s where they fit to each other.
The vertical members will be glued in place and then screwed into place first into the 4x4s and then screw from the top through using the deep sunk 4 inch screws.
Part 6 – Sanding, Staining, Then Finishing
This is perhaps one of the most satisfying stages of the process and if you are a beginner, you will love how satisfying this is. To start you want to sand first using your 150 grit paper.
You can use an electric sander to save time, but this is by no means something you need. After you are happy with the smoothness you are able to achieve, you can use the pre-stain conditioner, which is something you should not skip as it will ensure that your stain works perfectly.
After you have let the conditioner dry for a couple of hours, you can use the old rags you have got to apply your stain of choice.
The time needed before wiping off the stain depends on the brand you use, but usually you will wait around 10 minutes before wiping off the excess.
You will want to leave this all to set overnight and then after this you can finish it off with the matte finish or a similar finish like the one we recommended in the supply list.
Part 7 – Putting Together The Base Brackets
When it comes to connecting the crosspieces to the centerpiece we used the bolts and steel brackets to avoid as little wiggle inside the structure as possible.
To help with aesthetics, you can spray paint your visible bolts and brackets to match the stain you have chosen, but if this is not something you want to do you can save yourself the time.
When drilling the brackets you want to mark on both sides where it is going and then bolt them on when you are confident where they are going. By using brackets on both sides you only need to use washers on the outside.
Part 8 – Assembling The Table
So now all the separate pieces are completely assembled, so all you have to do is put them together to make the whole product work.
We started by standing up one of the base crosspieces and then bolting this to the brackets which are on the base of the centerpiece. This is quite easy since the base should be able to stand on its own.
Because of this adding the other base crosspiece should not be too hard either. If your measurements have been correct, by just tightening your bolts the piece should level itself.
With this part done, you can lift your tabletop onto the base and it should fit onto it perfectly. To add it to the base you can secure it using the 5 deep sunk 4 inch screws which will come up from the horizontal members.
One will be in the center of your centerpiece and then one will be each side of your centerpiece of the cross post. For a hint, you can electrical tape to measure the correct depth for driving the screws to make sure it will go all the way through to the frame.
Takeaway
This is an incredibly rewarding process to go through, and the results are amazing to have such a beautiful piece of furniture which you have made and designed yourself.
You want to be very careful if you are a beginner as working with power tools for the first time can be very overwhelming and you will want to make sure that you have gotten the correct guidance to work with this equipment properly.
But if you are confident in your ability to learn techniques, this furniture is fun to make!
- The Woodworkers Guide to Brad Nailers: Everything You Need to Know - September 25, 2023
- How To DIY An Aztec Garden Dining Table [The Easy Way] - October 18, 2022
- Farrow & Ball Pigeon: Is It Right For Your Home? - October 17, 2022

